
 Kia Sportage: Brake Pedal: Repair procedures
Kia Sportage Service & Repair Manual (3rd Generation, SL; 2011-2016) / Brake System / Brake System / Brake Pedal: Repair procedures
| Removal |
| 1. |
Remove the crash pad lower panel and reinforcement panel. (Refer to the Body group- crash pad). |
| 2. |
Pull down steering column shaft after removing bolts and nuts. |
| 3. |
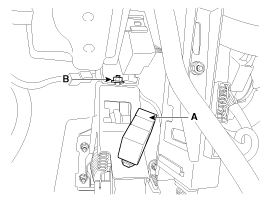
Disconnect the stop lamp switch connector (A).
|
| 4. |
Remove the brake pedal member mounting nut (B).
|
| 5. |
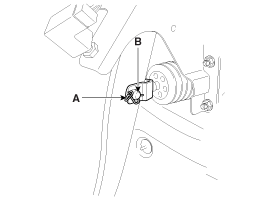
Remove the snap pin (A) and clevis pin (B).
|
| 6. |
Remove the brake pedal member assembly mounting nuts and then remove the brake pedal assembly.
|
| 7. |
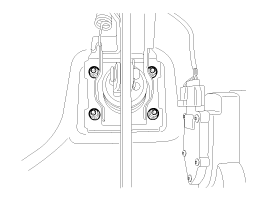
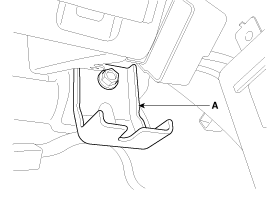
Remove the cowl bracket (A).
|
| Inspection |
| 1. |
Check the bushing for wear. |
| 2. |
Check the brake pedal for bending or twisting. |
| 3. |
Check the brake pedal return spring for damage. |
| 4. |
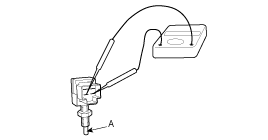
Check the stop lamp switch.
|
| Installation |
| 1. |
Installation is the reverse of removal.
|

| 2. |
Adjust the brake pedal height and free play. |
| 3. |
Check the brake pedal operation. |
| Adjustment |
| Brake Pedal Height and Free Play |
| 1. |
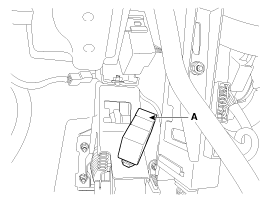
Disconnect the stop lamp switch connector (A) and loosen the stop lamp switch lock nut.
|
| 2. |
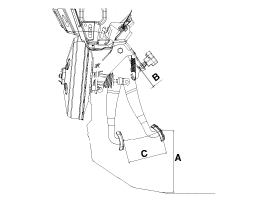
Adjust the brake pedal height (A) as illustration below.
|
| 3. |
Adjust the stop lamp switch clearance (B) and brake pedal free play.
|
| 4. |
Connect the stop lamp switch connector. |
Components
1. Cowl bracket2. Brake pedal member assembly3. Stop lamp switch4. Return spring5. Brake pedal stopper6. Clevis pin7. Snap pin8. Brake pedal...
 Brake Pedal: Components and Components Location
Components
1. Guide rod bolt2. Bleed screw3. Caliper bracket 4. Caliper body5. Inner pad shim6. Brake pad7. Pad retainer...
 Front Disc Brake: Components and Components Location
See also:
Tyre Specification and Pressure Label. Engine Number
Tyre Specification and Pressure Label
The tyre label is located on the centre pillar and lists the pressures recommended for your Kia Sportage. The tyres
f ...
Operating door locks from outside the vehicle
Turn the key clockwise to unlock and counterclockwise to lock.
If you lock the driver’s door with a key, all vehicle doors will lock automatically.
From the driver’s door, turn the key to ...
Dimensions. Engine
Dimensions
Item
mm (in)
A
Overall length
...
Categories
- Home
- Kia Sportage NQ5 (2022-2026) Owner's Manual
- Kia Sportage QL (2015-2019) Owner's Manual
- Kia Sportage QL (2015-2019) Service Manual
- Kia Sportage SL 2010-2016 Owner's Manual
- Kia Sportage SL 2010-2016 Service Manual

Copyright © sl.kispmanual.com 2014-2026 - 0.0713