
 Kia Sportage: Rear Seat: Repair procedures
Kia Sportage Service & Repair Manual (3rd Generation, SL; 2011-2016) / Body (Interior and Exterior) / Seat & Power Seat / Rear Seat: Repair procedures
| Replacement |
Seat Assembly Replacement
| 1. |
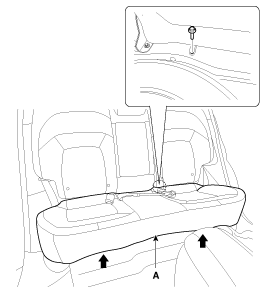
After loosening the mounting bolt, then remove the rear seat cushion (A).
|

| 2. |
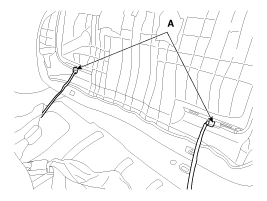
Disconnect the rear seat cushion warmer connectors (A).
|
| 3. |
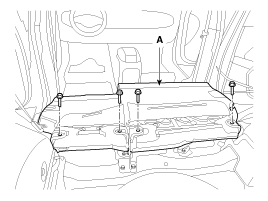
After loosening the mounting bolts, then remove the rear seat back (A).
|
| 4. |
Installation is the reverse of removal.
|

Seat Back Cover Replacement [RH]
|
| 1. |
Remove the rear seat assembly. |
| 2. |
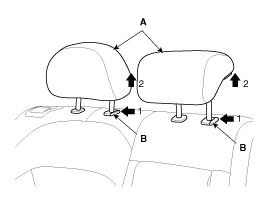
Push the lock pin (B) and then remove the headrest (A).
|
| 3. |
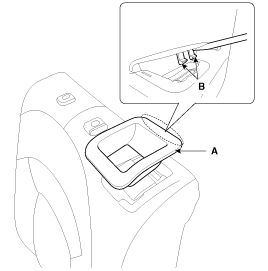
Push the hook (B) and then reomve the upper bezel (A).
|
| 4. |
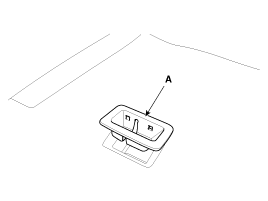
Using a screwdriver or remover, remove the tether anchor garnish (A).
|
| 5. |
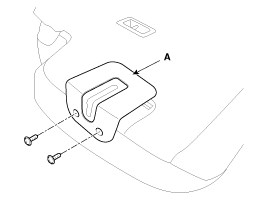
After loosening the mounting screws, then remove the latch cover (A).
|
| 6. |
Using a long nose, remove the rock pin (B) and armrest (A).
|
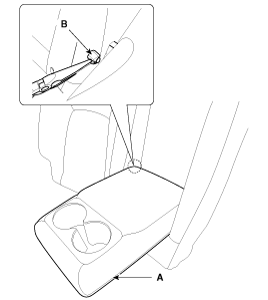
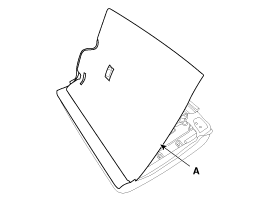
| 7. |
Zip off the seat back cover (A), and then full it up.
|
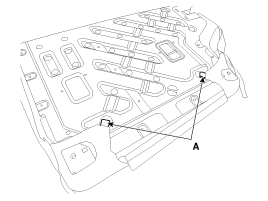
| 8. |
Disconnect the protector (A).
|
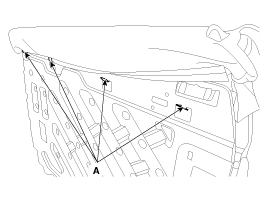
| 9. |
Disconnect the hooks (A).
|
| 10. |
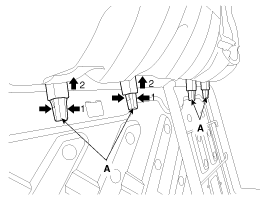
Pull out the headrest guides (A) while pinching the end of the guides, and remove them.
|
| 11. |
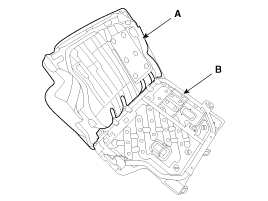
Remove the seat back cover (A) from the seat back frame (B).
|
| 12. |
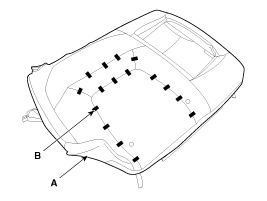
After removing the hog ring clips (B) on the rear of seat back, remove the seat back cover (A).
|
| 13. |
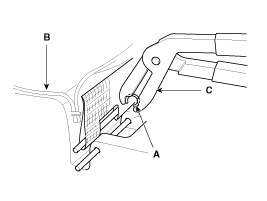
Installation is the reverse of removal.
|
Rear Seat Latch Replacement
| 1. |
Remove the seat back cover. |
| 2. |
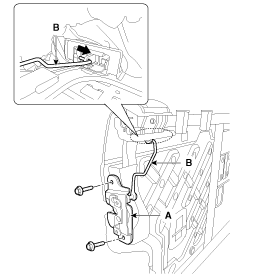
After loosening the mounting bolts and then disconnecting the rod (B). |
| 3. |
Remove the rear seat latch (A).
|
| 4. |
Installation is the reverse of removal. |
Seat Back Cover Replacement [LH]
|
| 1. |
Remove the rear seat assembly. |
| 2. |
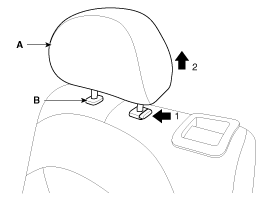
Push the lock pin (B) and then remove the headrest (A).
|
| 3. |
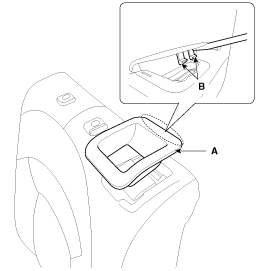
Push the hook (B) and then remove the upper bezel (A).
|
| 4. |
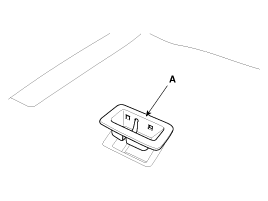
Using a screwdriver or remover, remove the tether anchor garnish (A).
|
| 5. |
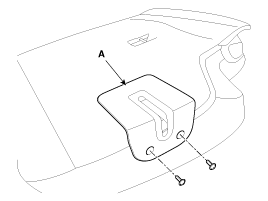
After loosening the mounting screws, then remove the latch cover (A).
|
| 6. |
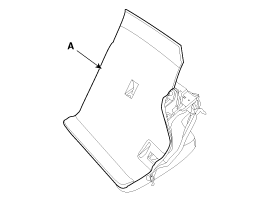
Zip off the seat back cover (A), and then full it up.
|
| 7. |
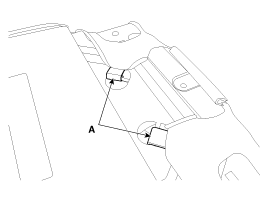
Disconnect the protector (A).
|
| 8. |
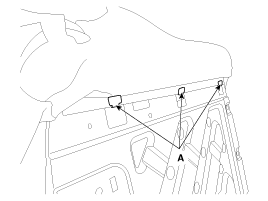
Disconnect the hooks (A).
|
| 9. |
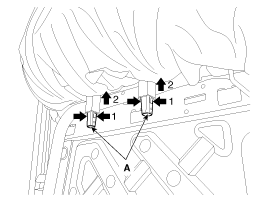
Pull out the headrest guides (A) while pinching the end of the guides, and remove them.
|
| 10. |
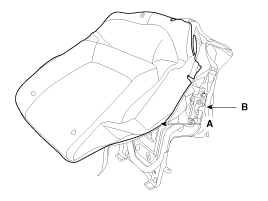
Remove the seat back cover (A) from the seat back frame (B).
|
| 11. |
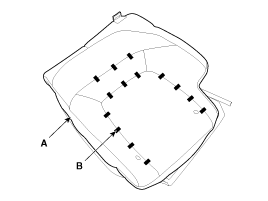
After removing the hog ring clips (B) on the rear of seat back, remove the seat back cover (A).
|
| 12. |
Installation is the reverse of removal.
|
Rear Seat Cushion Cover Replacement
|
| 1. |
Remove the rear seat cushion. |
| 2. |
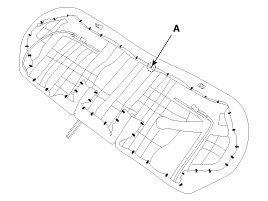
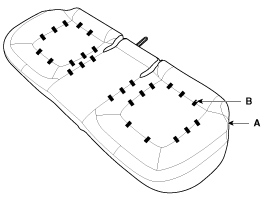
Remove the hog ring clips (A).
|
| 3. |
After removing the hog ring clips (B) on the rear of seat cushion, remove the seat cushion cover (A).
|
| 4. |
Installation is the reverse of removal.
|
Components
1. Headrest2. Headrest guide3. Tether anchor garnish4. Upper bezel5. Rear seat back pad6. Latch cover7. Rear seat back cover8. Armrest board9. Rear armrest10. Rear seat back frame11.Re...
 Rear Seat: Components and Components Location
...
 Seat Belt
See also:
Rear Differential Carrier: Components and Components Location
Component
1. Drive pinion nut 2. Oil seal3. O-ring4. Oil seal5. Front bearing6. Spacer7. Rear bearing8. Inner shim9. Drive pinion gear10. Differential carrier11. Bearing cap12. Bearing cap bolt1 ...
Overdrive Clutch Control Solenoid Valve(OD/C_VFS): Specifications
Specifications
Direct control VFS[OD/C]
? Control type : Normal high type
Control Pressure kpa (kgf/cm?, psi)500.14 ~ 9.81 (5.1 ~ 0.1, 72.54 ~ 1.42)Current value(mA)50 ~ 850 Internal resis ...
Tailgate open warning light
This warning light illuminates when the tailgate is not closed securely with
the ignition switch in any position. ...
Categories
- Home
- Kia Sportage NQ5 (2022-2026) Owner's Manual
- Kia Sportage QL (2015-2019) Owner's Manual
- Kia Sportage QL (2015-2019) Service Manual
- Kia Sportage SL 2010-2016 Owner's Manual
- Kia Sportage SL 2010-2016 Service Manual

Copyright © sl.kispmanual.com 2014-2026 - 0.0544