
 Kia Sportage: Roof Trim: Repair procedures
Kia Sportage Service & Repair Manual (3rd Generation, SL; 2011-2016) / Body (Interior and Exterior) / Interior / Roof Trim: Repair procedures
| Replacement |
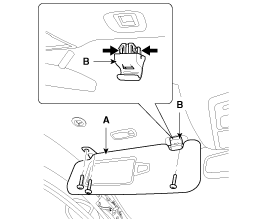
Sunvisor Replacement
|

| 1. |
After loosening the mounting screws, then remove the sunvisor (A) and retainer (B).
|
| 2. |
Installation is the reverse of removal. |
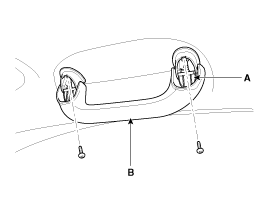
Assist Handle Replacement
|
| 1. |
Remove the covers (A). |
| 2. |
After loosening the mounting screws, then remove the assist handle (B).
|
| 3. |
Installation is the reverse of removal. |
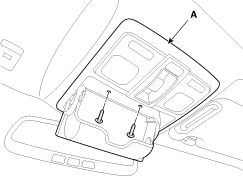
Overhead Console Replacement
|
| 1. |
After loosening the mounting screws, then remove the overhead console assembly (A).
|
| 2. |
Disconnect the connectors (A).
|
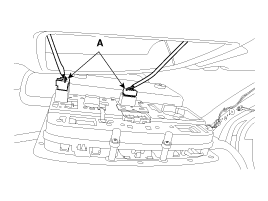
| 3. |
Installation is the reverse of removal.
|

Room Lamp Replacement
|
| 1. |
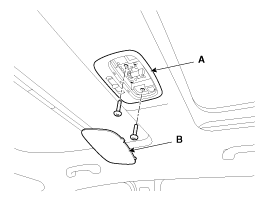
Using a screwdriver or remover, remove the room lamp cover (B). |
| 2. |
After loosening the mounting screws, then remove the room lamp (A).
|
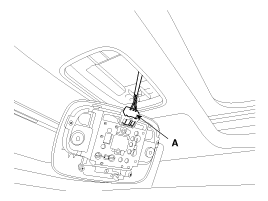
| 3. |
Disconnect the connector (A).
|
| 4. |
Installation is the reverse of removal.
|
Vanity Lamp Replacement
|
| 1. |
Using a screwdriver or remover, remove the vanity lamp (A). |
| 2. |
Disconnect the connector (B).
|
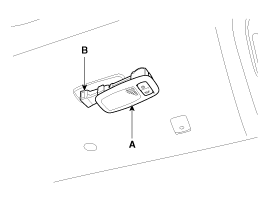
| 3. |
Installation is the reverse of removal.
|
Roof Trim Replacement
|
| 1. |
Remove the following items.
|
| 2. |
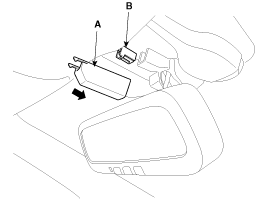
Remove the ECM mirror cover (A). |
| 3. |
Disconnect the ECM mirror connector (B).
|
| 4. |
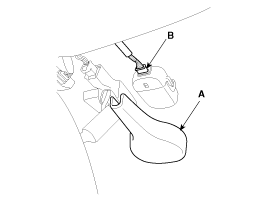
Remove the rain sensor cover (A). |
| 5. |
Disconnect the rain sensor connector (B).
|
| 6. |
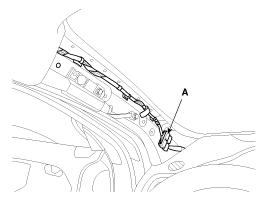
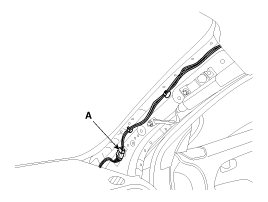
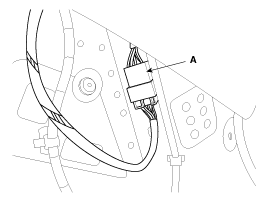
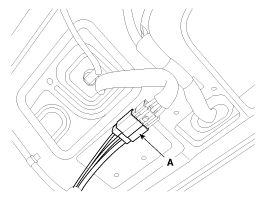
Disconnect the roof trim main connector (A).
[Driver''s]
[Passenger''s]
|
| 7. |
Disconnect the antenna connector (A).
|
| 8. |
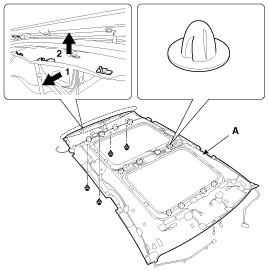
Remove the clips and roof trim (A).
|
| 9. |
Installation is the reverse of removal.
|
Components
1. Roof trim2. Sunvisor [Driver''s]3. Sunvisor [Passenger''s]
Components [Panoramaroof]
1. Roof trim2. Sunvisor [Driver''s]3. Sunvisor [Passenger''s]...
 Roof Trim: Components and Components Location
Components
1. Front pillar trim2. Center pillar upper trim3. Center pillar lower trim4. Luggage side trim5. Cowl side trim6. Front door scuff trim7. Rear door scuff trim8. Front step trim9. Rear ...
 Interior Trim: Components and Components Location
See also:
KEY OUT indicator
When the ENGINE START/STOP button is in the ACC or ON position, if any door is
open, the system checks for the smart key. If the smart key is not in the vehicle,
the indicator will blink, and if ...
Abbreviations
This glossary explains abbreviations used throughout the Kia Sportage manual. Use it to identify the systems,
features and terms referenced in the vehicle instructions.
ABS
...
Front Door: Components and Components Location
Components
1. Front door trim2. Front door inside handle cap3. Front door trim seal4. Front door quadrant inner cover5. Front door module6. Front door panel7. Front door belt outside moulding8. ...
Categories
- Home
- Kia Sportage NQ5 (2022-2026) Owner's Manual
- Kia Sportage QL (2015-2019) Owner's Manual
- Kia Sportage QL (2015-2019) Service Manual
- Kia Sportage SL 2010-2016 Owner's Manual
- Kia Sportage SL 2010-2016 Service Manual

Copyright © sl.kispmanual.com 2014-2026 - 0.0766