
 Kia Sportage: Torque Converter Control Solenoid Valve (T/CON_VFS): Repair procedures
Kia Sportage Service & Repair Manual (3rd Generation, SL; 2011-2016) / Automatic Transaxle System / Automatic Transaxle Control System / Torque Converter Control Solenoid Valve (T/CON_VFS): Repair procedures
| Inspection |
| 1. |
Turn ignition switch OFF. |
| 2. |
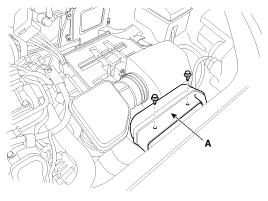
Remove the air duct (A).
|
| 3. |
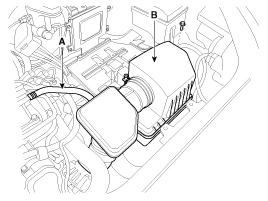
Remove the air cleaner assembly.
|
| 4. |
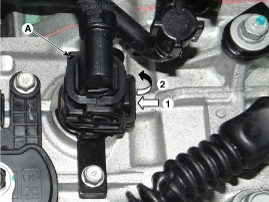
Disconnect the solenoid valve connector (A).
|
| 5. |
Measure resistance between sensor signal terminal and ground terminal. |
| 6. |
Check that the resistance is within the specification. |
| Removal |
| 1. |
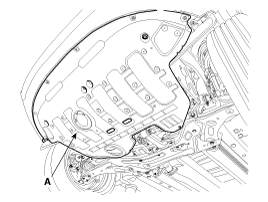
Remove the under cover (A).
|
| 2. |
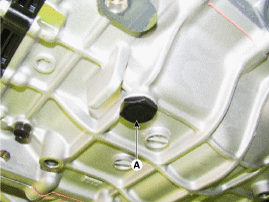
Remove the drain plug (A) and drain the ATF totally and then reinstall the drain plug.
|

| 3. |
Remove the air duct (A).
|
| 4. |
Remove the air cleaner assembly.
|
| 5. |
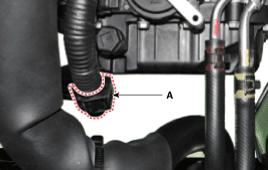
Disconnect the clip (A) from the valve body cover.
|
| 6. |
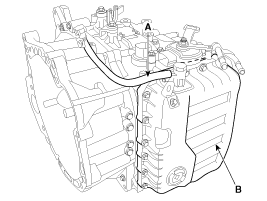
Remove the air breather hose (A). |
| 7. |
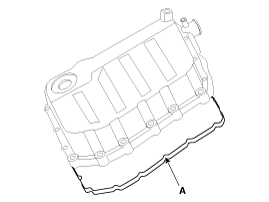
Remove t he valve body cover (B).
|
| 8. |
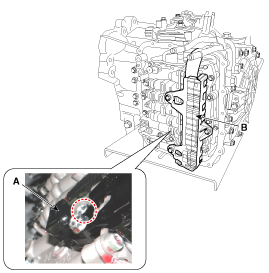
Remove the solenoid valve connector (B) and the oil temperature sensor (A).
|
| 9. |
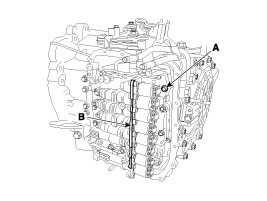
Remove the solenoid valve support bracket (B) and the valve body mounting bolt (A-1ea).
|
| 10. |
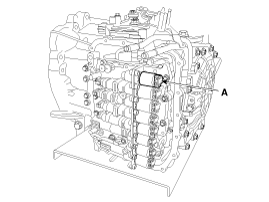
Remove the torque converter control solenoid valve (A).
|
| Installation |
| 1. |
Install in the reverse order of removal.
|
Circuit Diagram...
 Torque Converter Control Solenoid Valve (T/CON_VFS): Schematic Diagrams
Description
26Brake control solenoid valve(26/B) is attached to the valve
body. This variable force solenoid valve directly controls the
hydraulic pressure inside the 26Brake....
 26 Brake Control Solenoid Valve(26/B_VFS): Description and Operation
See also:
Underdrive Brake Control Solenoid Valve(UD/B_VFS): Repair procedures
Inspection
1.
Turn ignition switch OFF.
2.
Remove the air duct (A).
3.
Remove the air cleaner assembly.
(1)
Disconnect the breather hose (A) and brake booster intensifier hose.
(2)
...
Front Disc Brake: Components and Components Location
Components
1. Guide rod bolt2. Bleed screw3. Caliper bracket 4. Caliper body5. Inner pad shim6. Brake pad7. Pad retainer
...
Repair procedures
Starter Circuit Troubleshooting
The battery must be in good condition and fully charged.
1.
Disconnect the fuel pump relay (A) in the fuse box.
2.
With the shif ...
Categories
- Home
- Kia Sportage NQ5 (2022-2026) Owner's Manual
- Kia Sportage QL (2015-2019) Owner's Manual
- Kia Sportage QL (2015-2019) Service Manual
- Kia Sportage SL 2010-2016 Owner's Manual
- Kia Sportage SL 2010-2016 Service Manual

Copyright © sl.kispmanual.com 2014-2026 - 0.0638