
 Kia Sportage: Hood: Repair procedures
Kia Sportage Service & Repair Manual (3rd Generation, SL; 2011-2016) / Body (Interior and Exterior) / Exterior / Hood: Repair procedures
| Replacement |
Hood Assembly Replacement
|

| 1. |
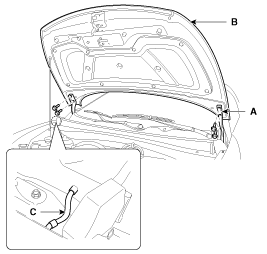
After loosening the hood hinge (A) mounting bolts, and then remove the hood (B). |
| 2. |
Remove the washer nozzle hose (C).
|
| 3. |
Installation is the reverse of removal.
|

Hood Insulator Pad Replacement
| 1. |
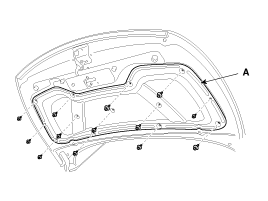
Using a clip remover detach the clips, and remove the hood insulator pad (A).
|
| 2. |
Installation is the reverse of removal.
|
Hood Seal Weatherstrip Replacement
| 1. |
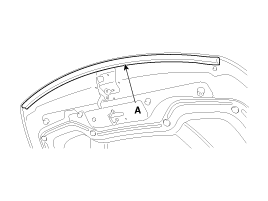
Detach the clips, then remove the hood seal weatherstrip (A).
|
| 2. |
Installation is the reverse of removal.
|
Hood Weatherstrip Replacement
| 1. |
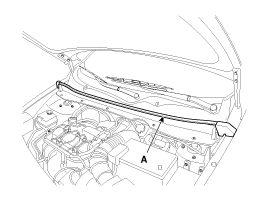
Remove the hood weatherstrip (A).
|
| 2. |
Installation is the reverse of removal. |
Hood Release Handle Replacement
| 1. |
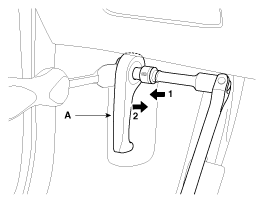
Remove the hood release handle (A).
|
| 2. |
Installation is the reverse of removal.
|
Hood Latch Replacement
| 1. |
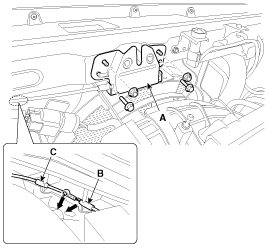
Remove the hood latch (A) mounting bolts and nuts. |
| 2. |
Disconnect the hood latch cable (B) and hood release cable (C).
|
| 3. |
Installation is the reverse of removal.
|
| Adjustment |
Hood Adjustment
| 1. |
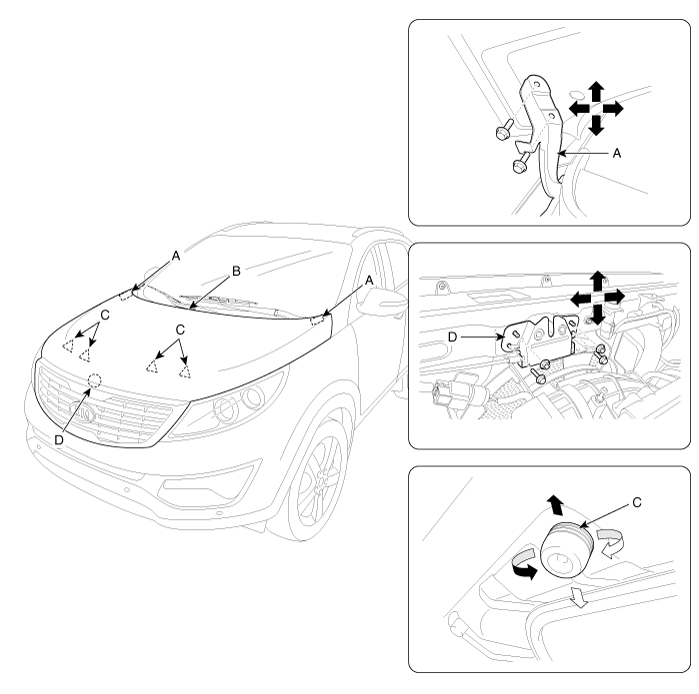
After loosening the hinge (A) mounting bolt, adjust the hood (B) by moving it up or down, or right or left. |
| 2. |
Adjust the hood height by turning the hood over slam bumpers (C). |
| 3. |
After loosening the hood latch (D) mounting bolts and nuts, adjust the latch by moving it up or down, or right or left.
|
Replacement
•
When removing and installing the fender, an assistant is necessary.
•
Be careful not to damage the fender and body.
•
Whe...
 Fender: Repair procedures
Replacement
Tail Gate Trim Replacement
•
When prying with a flat-tip screwdriver, wrap it with
protective tape, and apply protective tape around the relate...
 Tail Gate: Repair procedures
See also:
Photo Sensor: Repair procedures
Inspection
1.
Ignition "ON"
2.
Using the scan tool.
3.
Emit intensive light toward photo sensor using a lamp, and check the output voltage change.
4.
The voltage will rise with higher ...
Driver assistance system
TIP
The driver assistance system descriptions shown on the screen may differ from those in this owner’s manual,
depending on the infotainment software version installed in your Kia Sportage. ...
Explanation of Scheduled Maintenance Items
Engine oil and filter
Change the engine oil and filter at the intervals listed in the Kia Sportage maintenance schedule. If the vehicle is
used in severe driving conditions, replace them more freq ...
Categories
- Home
- Kia Sportage NQ5 (2022-2026) Owner's Manual
- Kia Sportage QL (2015-2019) Owner's Manual
- Kia Sportage QL (2015-2019) Service Manual
- Kia Sportage SL 2010-2016 Owner's Manual
- Kia Sportage SL 2010-2016 Service Manual

Copyright © sl.kispmanual.com 2014-2026 - 0.0647