
 Kia Sportage: Radiator: Repair procedures
Kia Sportage Service & Repair Manual (3rd Generation, SL; 2011-2016) / Engine Mechanical System / Cooling System / Radiator: Repair procedures
| Inspection |
Radiator Cap Testing
| 1. |
Remove the radiator cap, wet its seal with engine coolant, and then install it on a pressure tester.
|
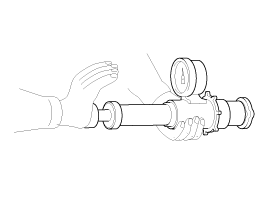
| 2. |
Apply a pressure of 93.16 ~ 122.58kPa (0.95 ~ 1.25kgf/cm?, 13.51 ~ 17.78psi). |
| 3. |
Check for a drop in pressure. |
| 4. |
If the pressure drops, replace the cap. |
Radiator Leakage Test
| 1. |
Wait until engine is cool, then carefully remove the radiator
cap and fill the radiator with engine coolant, then install it on the
pressure tester (A).
|
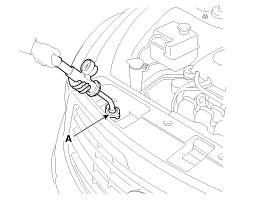
| 2. |
Apply a pressure tester to the radiator and apply a pressure of 93.16 ~ 122.58kPa (0.95 ~ 1.25kgf/cm?, 13.51 ~ 17.78psi). |
| 3. |
Inspect for engine coolant leaks and a drop in pressure. |
| 4. |
Remove the tester and reinstall the radiator cap.
|

| Removal and Installation |
| 1. |
Disconnect the battery terminals. (Refer to Engine and transaxle assembly in this group) |
| 2. |
Remove the air cleaner assembly and intercooler inlet/outlet
hose & pipes. (Refer to Engine and transaxle assembly in this group) |
| 3. |
Remove the battery and battery tray. (Refer to Engine and transaxle assembly in this group) |
| 4. |
Remove the radiator grill upper guard (A). (Refer to BD group)
|
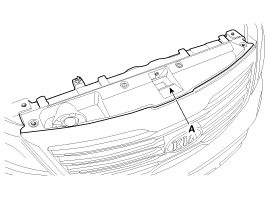
| 5. |
Remove the radiator upper cover (A).
|
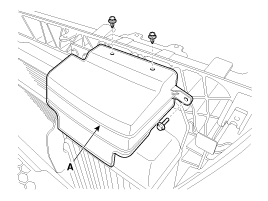
| 6. |
Remove the horn bracket (A). (Refer to BE group) |
| 7. |
Remove the radiator front air guard (B). |
| 8. |
Seperate the condenser (C) from the radiator.
|
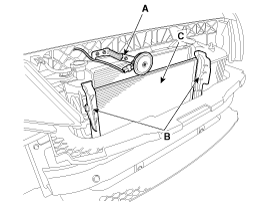
| 9. |
Disconnect the over flow hose (A) from the radiator.
|
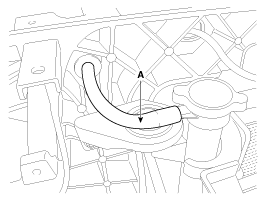
| 10. |
Remove the radiator mounting bracket assemblies (A).
|
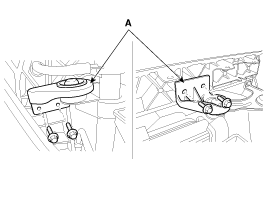
| 11. |
Disconnect the fan motor connector (A).
|
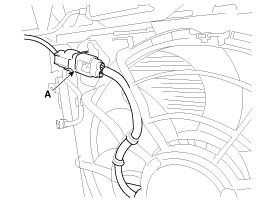
| 12. |
Remove the cooling fan assembly (A).
|
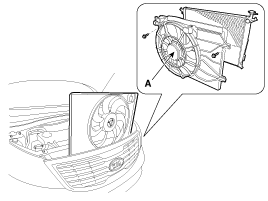
| 13. |
Remove the under cover. (Refer to Engine and transaxle assembly in this group) |
| 14. |
Loosen the drain plug, and drain the engine coolant. Remove the radiator cap to drain with speed. |
| 15. |
Disconnect the radiator upper hose (A) and lower hose (B).
|
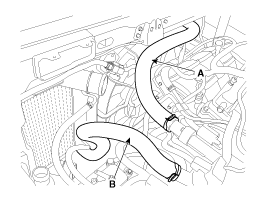
| 16. |
Disconnect the ATF cooler hoses. (Refer to AT group)
|
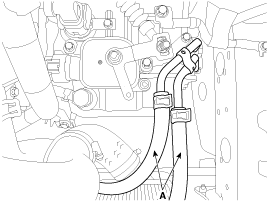
| 17. |
Remove the radiator assembly (A).
|
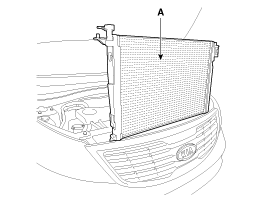
| 18. |
Installation is the reverse order of removal. |
| 19. |
Fill the radiator with coolant and check for leaks.
|
Components
1. Cooling fan assembly2. Radiator assembly3. Mounting insulator4. Radiator mounting bracket5. Radiator upper hose6. Radiator lower hose7. Reservoir tank8. Over flow hose9. ATF...
 Radiator: Components and Components Location
Components
1. Water pump pulley2. Water pump sub assembly3. Water pump gasket4. Water pump cover5. Water pump cover gasket6. O-ring7. Water inlet pipe8. Water temperature control assembly9. ...
 Water pump: Components and Components Location
See also:
Highway Driving Assist malfunction and limitations
Highway Driving Assist malfunction
A: Check Driver Assistance system.
If Highway Driving Assist detects a fault, a warning ...
Important: Using the Compact Spare Tyre (If Equipped). Jack Label
Important: Using the Compact Spare Tyre (If Equipped)
The compact spare tyre fitted to the Kia Sportage is smaller than a standard tyre and is intended for temporary
emergency use only.
Precaution ...
Tire: Repair procedures
Tire wear
1.
Measure the tread depth of the tires.
Tread depth [limit] : 1.6 mm (0.063 in.)
2.
If the remaining tread (A) depth is less than the limit, replace the tire.
&nbs ...
Categories
- Home
- Kia Sportage NQ5 (2022-2026) Owner's Manual
- Kia Sportage QL (2015-2019) Owner's Manual
- Kia Sportage QL (2015-2019) Service Manual
- Kia Sportage SL 2010-2016 Owner's Manual
- Kia Sportage SL 2010-2016 Service Manual

Copyright © sl.kispmanual.com 2014-2026 - 0.0621